Monday, April 28, 2014

Not your mom's baked pork chops with cauliflower rice!

I grew up eating pork chops and meatloaf and hamburger helper and tuna casserole.  Why yes, I did grow up in the Midwest.  Why do you ask?  

I still get cravings for some of the recipes my mom made with condensed Campbell's soup (or in our case, store brand condensed soup).  But now I am older (a little) and wiser (a lot) and I am able to create similar flavors with much better ingredients.

For your pork chops you'll need:
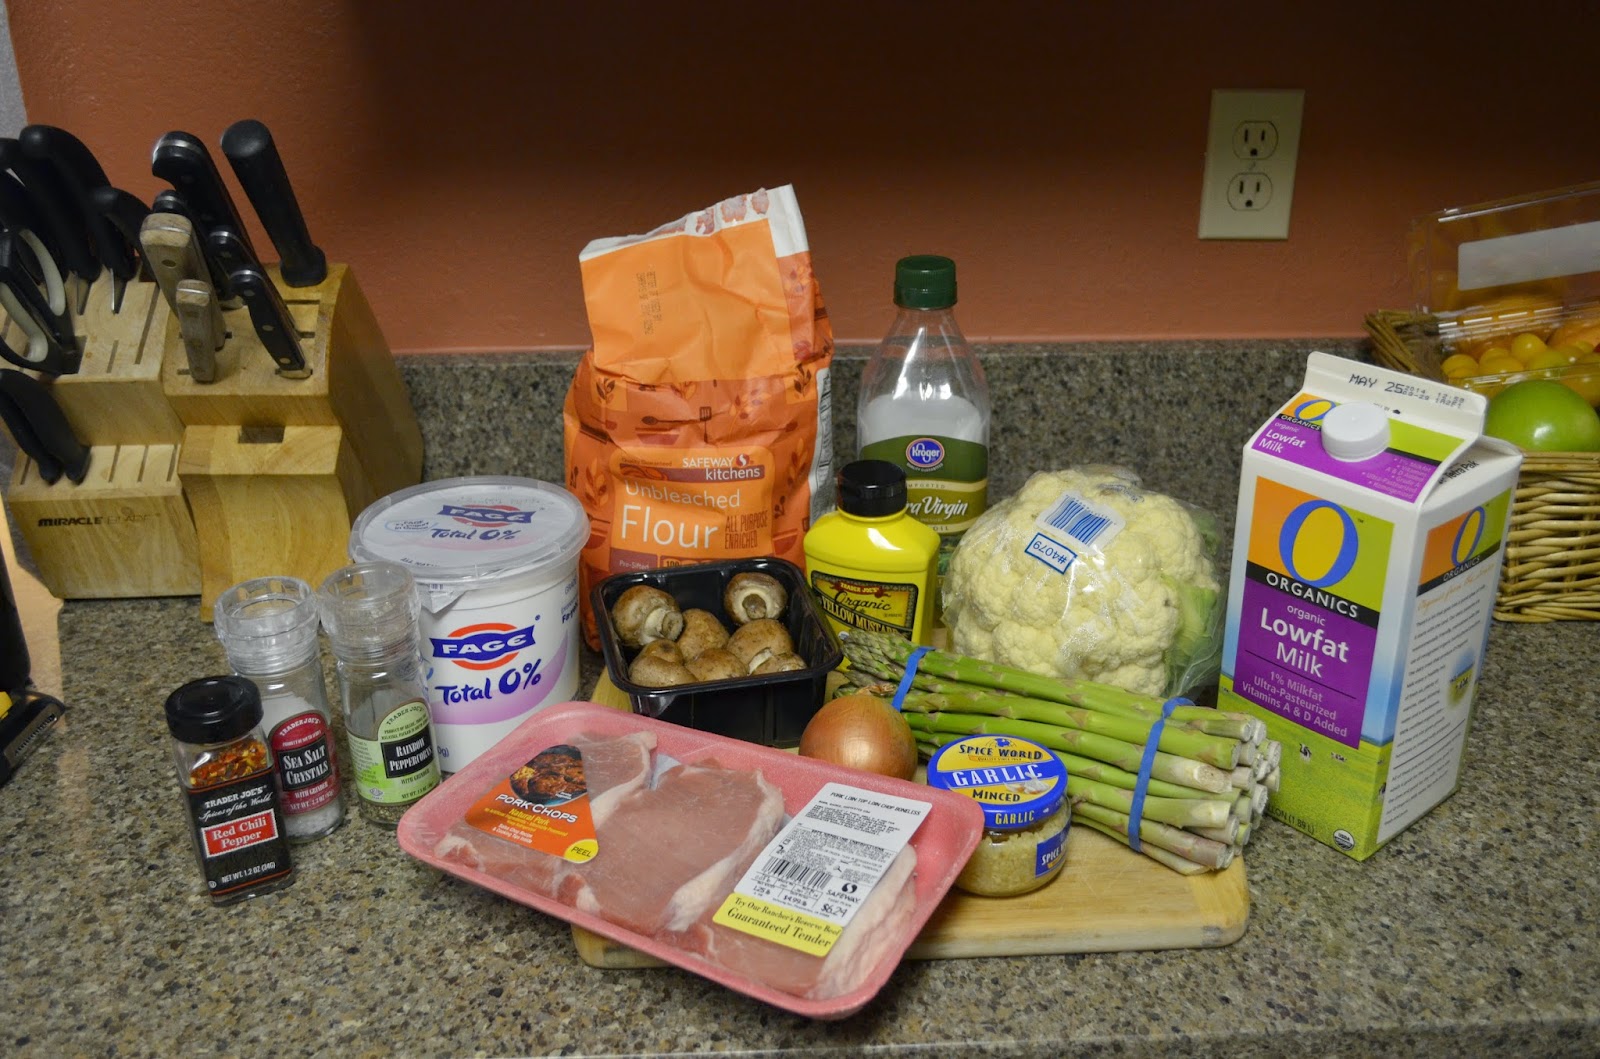
  • Pork chops, mine were boneless loin chops about an inch thick.
  • Mustard, about a tablespoon per chop.
  • 1/2 cup flour
  • 1 tsp red pepper flakes
  • 2 cups mushrooms, sliced
  • 1 onion, sliced
  • 1 clove garlic
  • 4 Tbs. Olive oil, divided
  • 2 cups milk
  • 1/2 cup Greek yogurt (optional)
  • Salt and pepper to taste
  • Oven preheated to 350 degrees
Start by browning your mushrooms and sauteing your onion in olive oil, doing it by batches (I used about 2 T of olive oil during this process, starting with 1 T and adding more oil as needed).  I always think of the movie Julie & Julia when I'm cooking mushrooms, Julia Child's advice is "Don't crowd the mushrooms" and she is right.  You want to have the mushrooms spread out, so that when they release their moisture, it's not so crowded in the pan that they don't brown.  I like to do this at a medium heat.  Remove the veggies from the and set aside.  Heat your pan to high for the pork chops.

To prep a flour dredge for your pork chops, add the 1/2 cup of flour to a shallow bowl or plate, add the red pepper flakes and salt and pepper to taste, reserving 2 T of the mixture for later. 

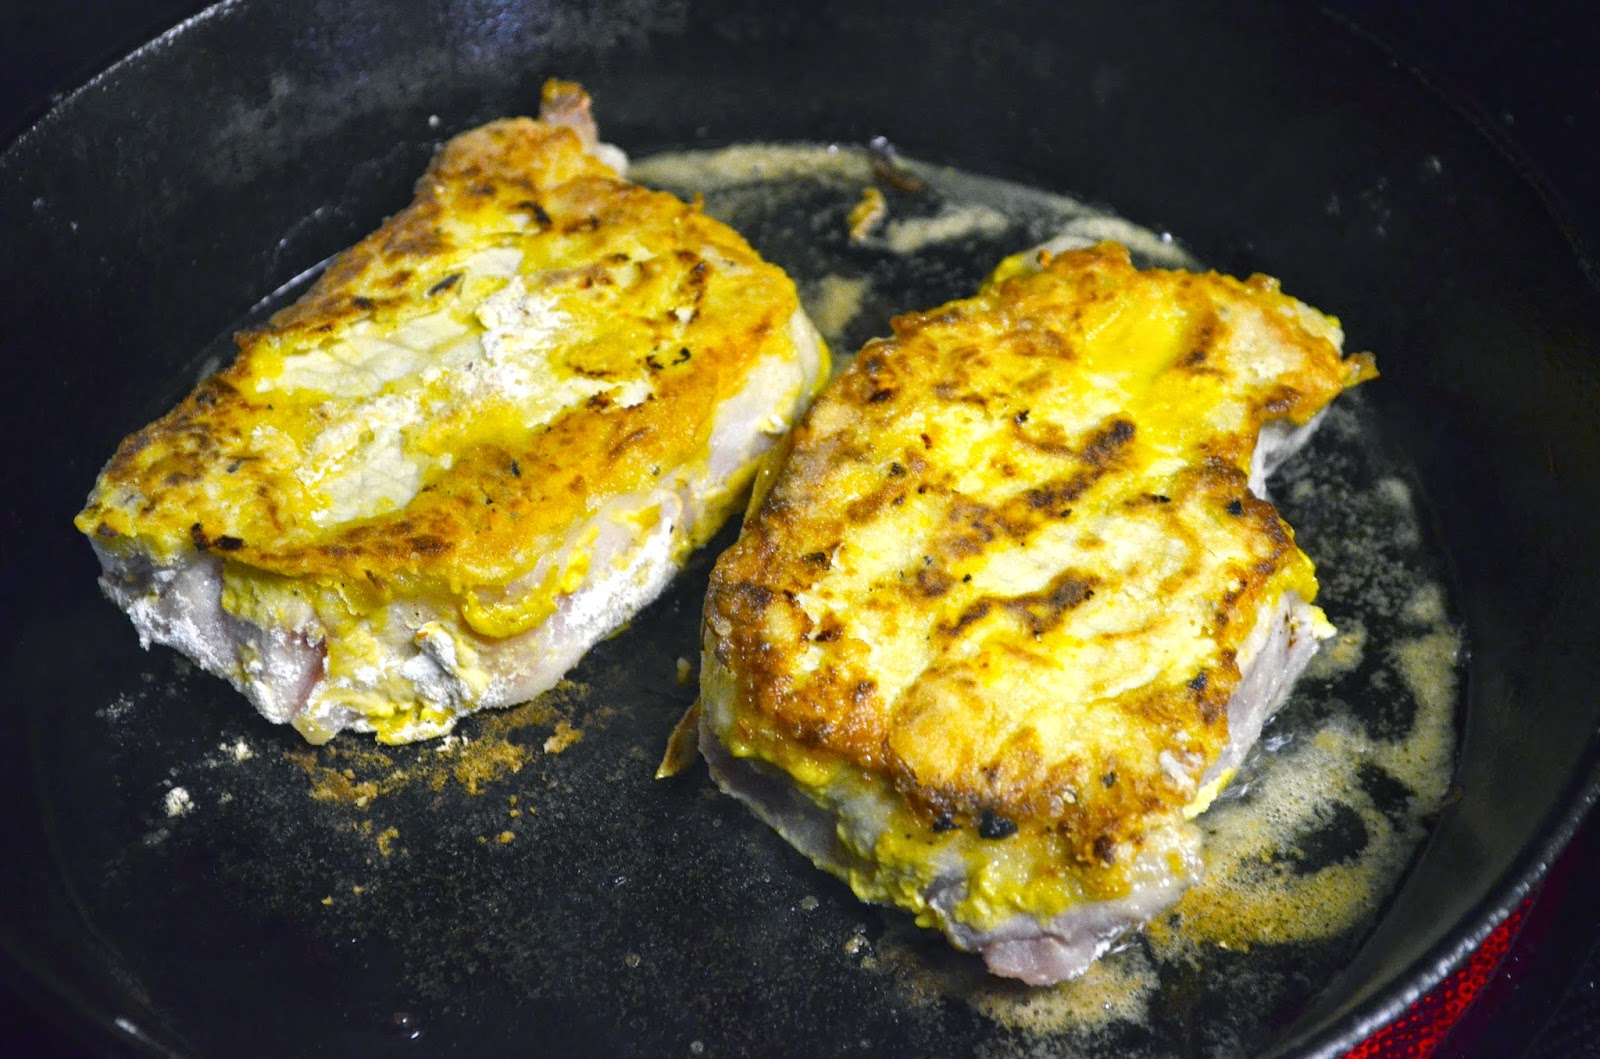
Next you'll want to prep your chops.  Start with dry pork chops (I use paper towels to blot mine).  Spread mustard all over the pork chops, then dredge them through the flour mixture and sear in a very hot pan with 1 T olive oil.


Remove the pork chops, reduce heat to medium to medium low and add your last tablespoon of olive oil (or if you're wanting some richness, a tablespoon of butter).  Sprinkle your reserved flour mixture into the oil or butter and create a roux

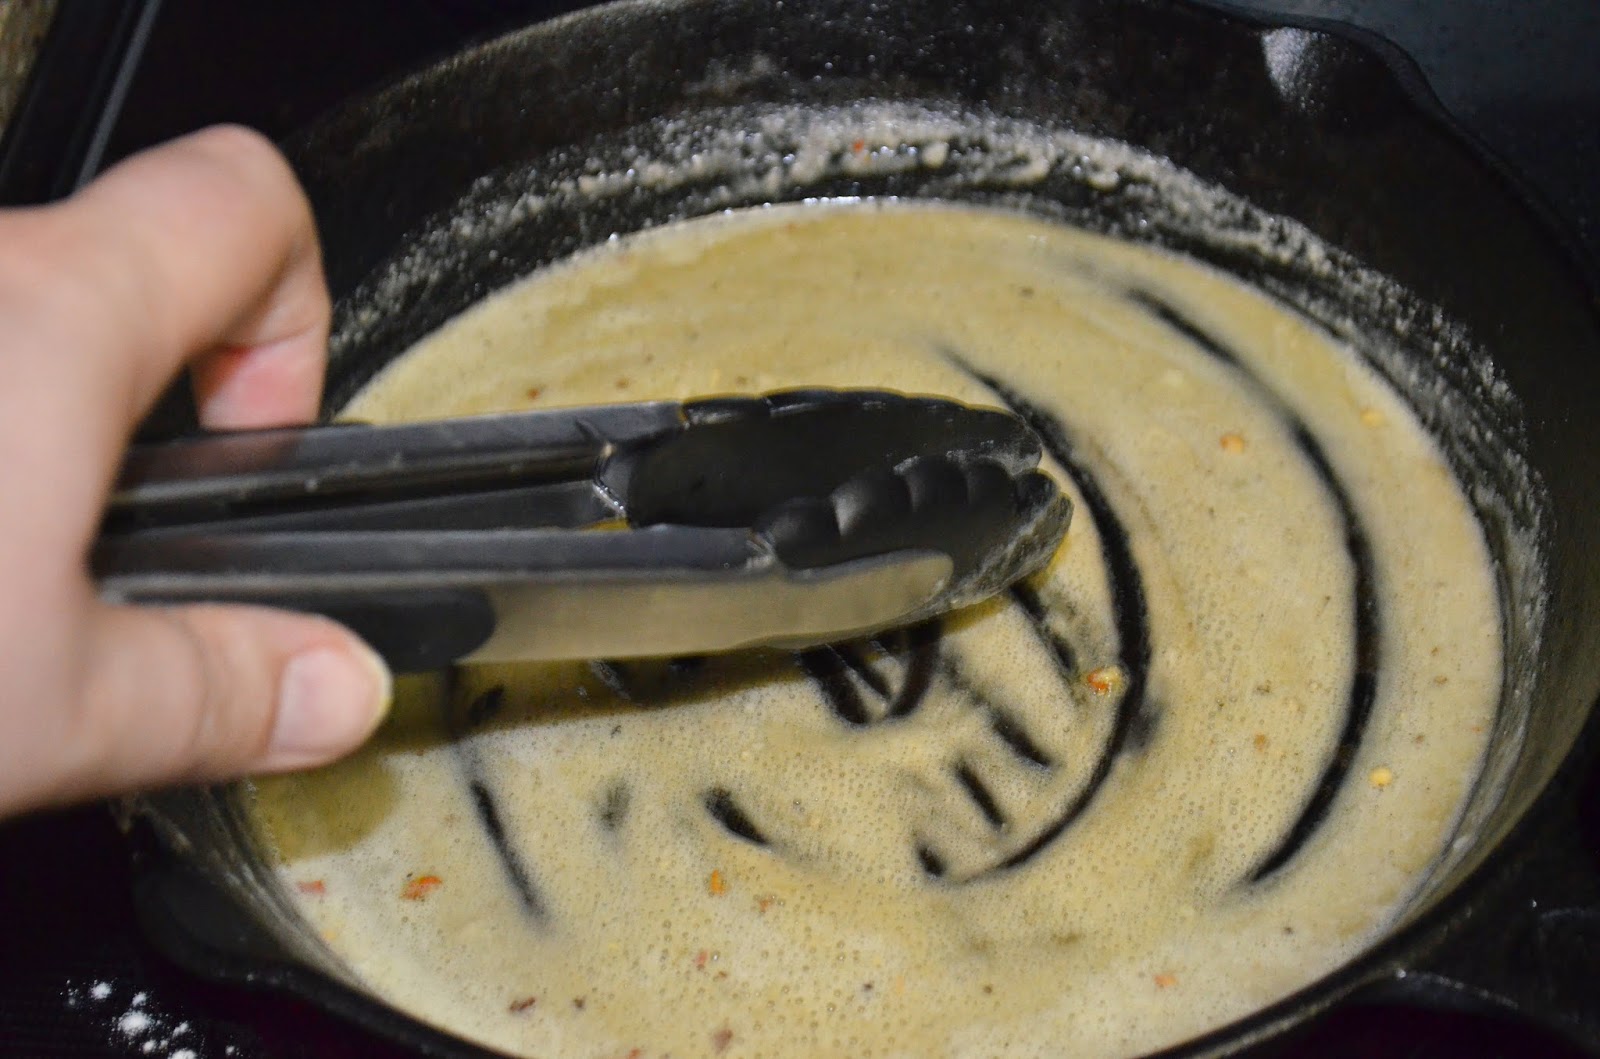
Cook the roux for several minutes until it is light brown and all of the flour is incorporated.


Return your veggies to the pan, then add your milk.  If you are also adding Greek yogurt (which lends a nice tanginess), whisk the milk and yogurt together first, to try and prevent the yogurt from forming curds.

Salt and pepper to taste, and mix everything together over medium heat.Add your pork chops back into the mixture.  Then cover with foil and place in the oven for 30 minutes.


When the pork chops are done, let them rest for at least 10 minutes to let the juices disperse.  The final temperature inside the chops should be 145 degrees, use a meat thermometer and please don't go hacking into the chops to see whether or not they're done, when you do that, all the moisture inside the meat escapes leaving behind dry, unpalatable pork.


While your pork cooks in the oven, you can make your veggie sides.  Tonight I'm doing a simple roasted asparagus and cauliflower rice.

What you'll need:

1 lb asparagus
1/2 head cauliflower
2 T olive oil
Salt, pepper, red pepper flakes to taste.

Line a cookie sheet with tin foil, if you so choose. Wash your veggies.

Snap the ends off the asparagus stalks and lay them on the sheet.

Mince the cauliflower into rice-like pieces.  I did this with a knife, but lots of people prefer to use their food processor.  I was just too lazy to get mine dirty and then wash it. 


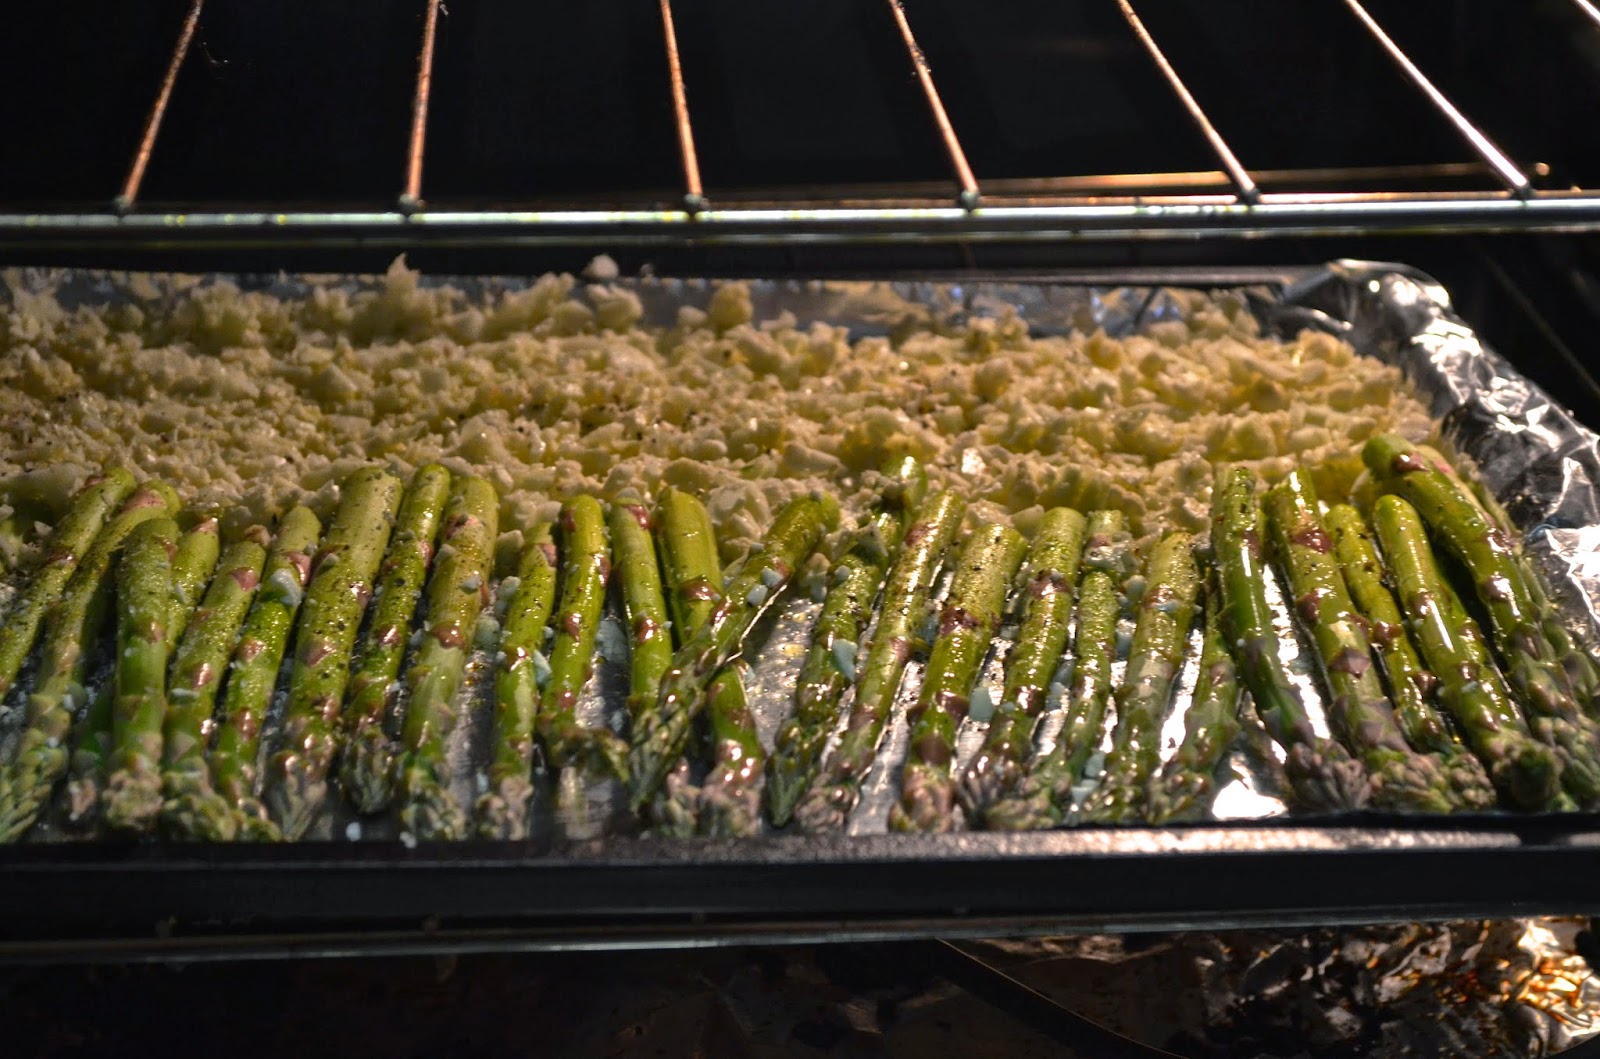
Drizzle olive oil over everything, add your spices and mix it up to make sure all the veggies are lightly coated. Make sure the cauliflower is just 1 layer on the sheet. Then put them it in the oven along with your pork chops for about 20 minutes.  About halfway through your time, stir everything so that it browns evenly.


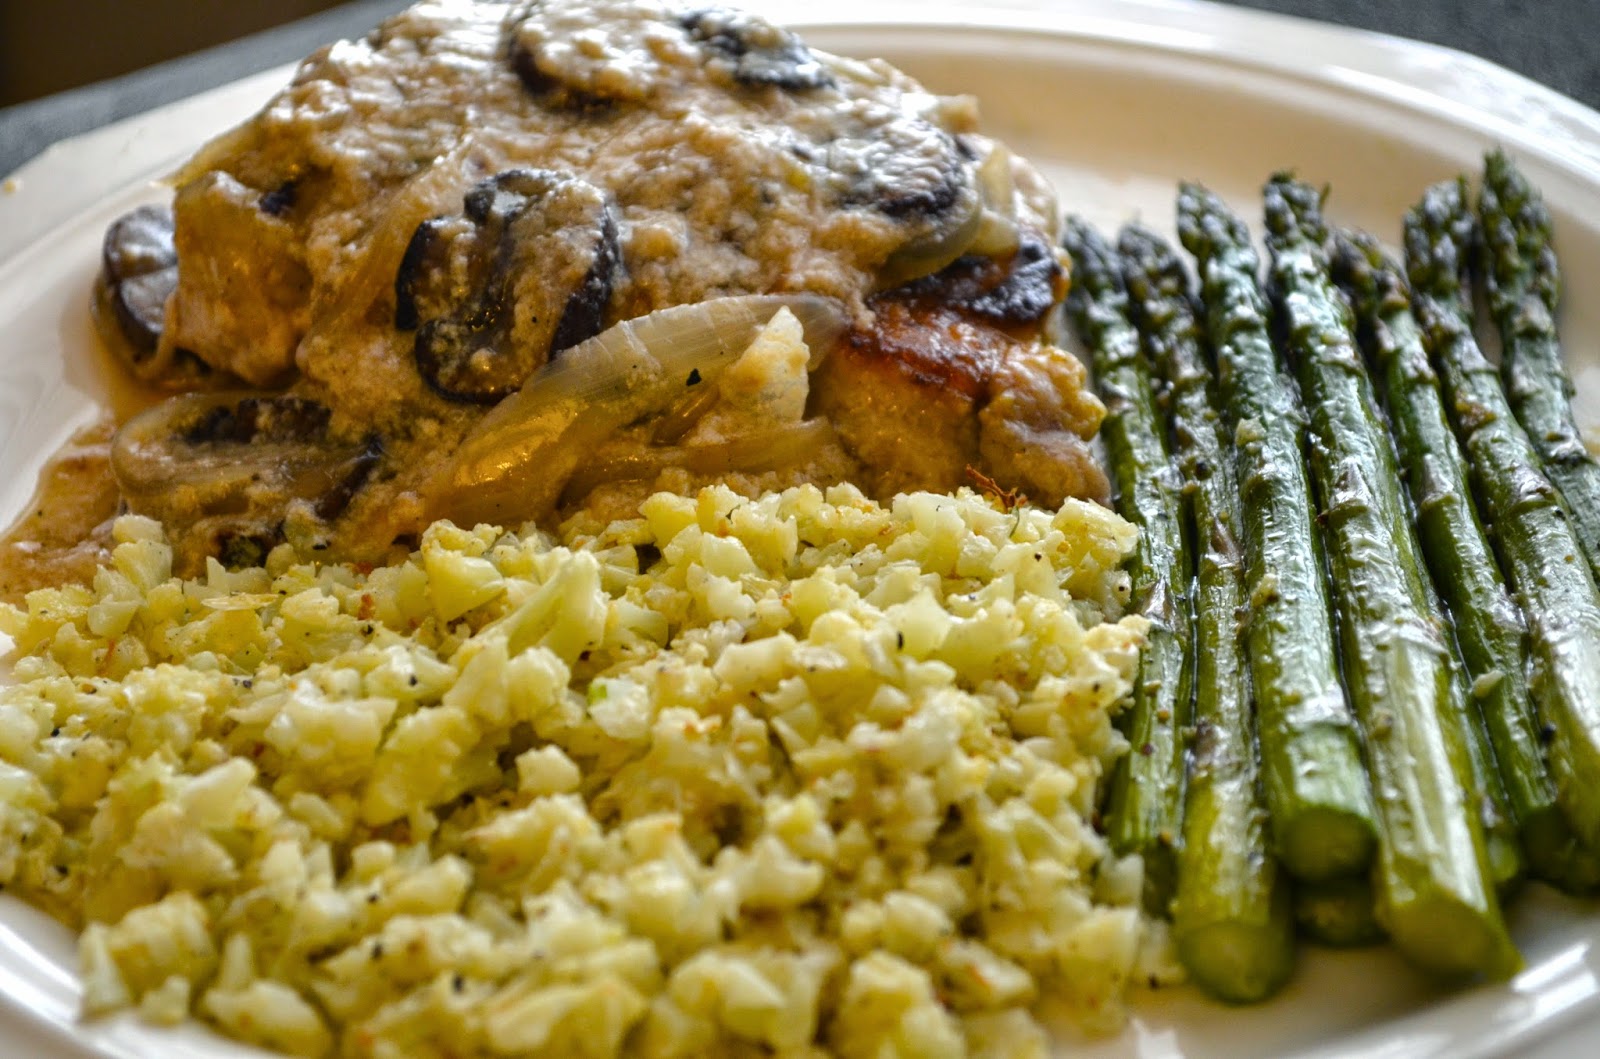
Make a plate, get out the cloth napkins and eat this delicious meal at a table with some wine!  I recommend a nice dry white. Bon Appetit!


Tuesday, April 22, 2014

Sausage, kale and cauliflower, oh my!


I make a lot of soup for myself.  I think it stems from years without a dishwasher and really embracing the idea of 1 pot cooking.  I also eat in my living room the majority of the time, I know you all imagine me dressing for dinner à la Downton Abbey, but usually I'm watching bad TV in my pajamas, balancing my dinner on my lap. That's the other reason soup is great, all you need is a spoon (and possibly a napkin), you don't have to worry about using a knife and fork to cut, while balancing your plate.  

Now, I recognize that I could just sit at the table like a civilized person, but it's just not who I am, man.  The Dudette abides in her bathrobe clutching her bowl of soup.

This soup is a go-to for me, and happens to be a variation on Zuppa Toscana.  Here's what you'll need:

  • 3 links of Italian turkey sausage
  • 1 onion, chopped
  • 2 carrots, chopped
  • 2 stalks celery, chopped
  • 1 head of cauliflower, chopped into bite-sized florets
  • 1 bunch of greens, this is Tuscan kale (3-4 cups, chopped)
  • 4 cups water
  • 4 cups milk
  • salt, pepper and red pepper flakes to taste
I like the Jennie-O Hot Italian sausage, but I like Hot Italian anything


Saute your onion, carrot and celery in the olive oil, after about 5 minutes, add your sausage, make sure to remove the casing first, so you're just adding the ground meat.  Once the turkey is browned, add 4 cups of water and your cauliflower to the pot.

Simmer the soup until the cauliflower is tender, then add your chopped greens and milk.  Spinach is cooked almost immediately, but kale takes a few minutes.  Make sure not to bring the soup to a hard boil after you've added the milk, because it can make the milk separate.  It won't taste bad, it'll just look kind of gross and grainy.

Total time with simmering, etc., about an hour.

When you're all done, throw on your PJs and snuggle up with some 30 Rock re-runs.  The one where Liz gets her own talk show is a personal favorite.

Monday, April 21, 2014

Adventure: An Easter Pilgrimage to Mt. Lemmon

I filed 3 state tax returns for last year.  It's been year of changes, a year of new homes, upheaval and self-reliance.  Now, self-reliance is nothing new to me; some would say (and have) that I am independent to a fault.  Instead of going to a potluck at my landlady's house, I took this past Sunday as an opportunity to reflect, give thanks and to set some goals for the future.   

This kind of reflection is always easier for me out in nature, where I have fewer distractions and an opportunity to let my mind wander.


I hope the weekend brought you something you needed, whether that something was Cadbury creme eggs or strength of purpose.  Happy Easter ~

Sunday, April 20, 2014

French lentil salad and a leftover falafel remix


French lentils, or lentilles de puy are my favorite lentils.  Which sounds like kind of a snotty thing to say, probably because they're French and, let's face it, having a favorite lentil is kind of ridiculous.  Anyway, French lentils stay firmer once they're cooked and tend to stay more intact than some of the other lentil varieties so they're great for salads. I can't always get French lentils, but I found these at Target and immediately envisioned a citrusy, salty lentil salad. 


Here's what you'll need:
  • 3 cups of stock 
  • 1 1/2 cups of French lentils
  • 1 clove garlic, minced
  • 1 bay leaf
  • 1 cup parsley, chopped
  • 1 lb. asparagus, ends trimmed and chopped into pieces
  • 1/2 cup chopped onion
  • 1/2 - 1 cup crumbled feta
  • juice of 1 lemon
  • 1/4 cup of olive oil
  • salt, pepper and cayenne to taste


Put your stock on the stove with the bay leaf, cover and bring to a boil.  Add your lentils, garlic and onion, recover and let simmer for about 20 minutes (these lentils take a little longer than your standard green lentils and they take a little more liquid).  When your lentils are just a touch short of done, toss the asparagus in the top of the pan to steam for about 3-5 minutes, until the asparagus is bright green and warm all the way through.


When the lentils are tender, remove from heat, drain through a mesh strainer if any residual liquid remains and remove the bay leaf.  Let the lentils cool (or put them in the freezer for a few minutes if you're impatient like me). Add your parsley, lemon, olive oil, feta and spices, tasting as you go.  It would be delicious to add grapefruit supremes to this salad as well (though they might not be delicious in the leftover remix that comes next, so just add them to the top of the salad).


So, lentil salad is great, but it's not really a meal. So a couple days after I made the salad, I pulled the leftovers out of the fridge and decided to make lentil falafel.

What you'll need:

  • Oven pre-heated to 350 degrees
  • an oven-safe frying pan 
  • a food processor or blender
  • olive oil 4 Tbs. separated
  • 1/4 cup bread crumbs (use gluten free bread crumbs, if you have an allergy)
  • 1 egg
  • greek yogurt
  • leftover chimichurri


Put about 2 cups of your lentil salad into the food processor.  Add the breadcrumbs, egg and 2 Tbs. olive oil.  Pulse until you have a chunky paste.  Form the paste into 1/4 cup-sized patties (I just used a spoon and my hands) and then put them in the fridge for 15-30 minutes to set.  Meanwhile, heat the remaining 2 Tbs. of olive oil in the pan on the stove.  Once the oil is hot, place the patties in the pan, taking care not to overcrowd.  You want to get them nice and crispy brown on both sides, then pop them in the oven for about 10 minutes to make sure they've heated and set all the way through.


Once your patties are done in the oven, mix up about 1/4 cup Greek yogurt with 2 Tbs of leftover chimichurri.  I served my sauce on a bed of arugula with lemon, olive oil and salt and pepper.


It was definitely a meal, not a side and the leftover patties made for a great lunch the next day!


Wednesday, April 16, 2014

Glamorous Chicken Salad

When I was a kid (and now too), I loved the Anne of Green Gables books and movies.  So much so that my mom, oldest friend and I took a trip to Prince Edward Island last summer to see her haunts, explore the beaches, visit the potato museum and eat as much seafood as possible. 

The Potato Museum, a truly hilarious experience.
It was completely beautiful on the island, I definitely recommend a visit!
Here is the house that inspired Green Gables
They have gorgeous red sand beaches, this one is on the north shore.
 In the movie, Anne's friend Diana dreams of living at a hotel on the beach for the summer:

Diana Barry: I wish I were rich, and I could spend the whole summer at a hotel, eating ice cream and chicken salad.
Anne Shirley: You know something, Diana? We are rich. We have sixteen years to our credit, and we both have wonderful imaginations. We should be as happy as queens.
[gestures to the setting sun]
Anne Shirley: Look at that. You couldn't enjoy its loveliness more if you had ropes of diamonds.
Diana Barry: I don't know about that.

And that's when chicken salad became a glamorous thing for me.  As a kid, I ate a lot of tuna salad and a lot of egg salad, but not really much chicken salad, so maybe that's another part of it too. 

One of my favorite quick meals is to buy a rotisserie chicken on the way home from work.  I typically roast some veggies, or throw the dark meat on top of a green salad and voila!  Dinner is served. But, living alone, a rotisserie chicken is good for several meals.  After pulling all the meat from the chicken carcass to make chicken stock, I decided to make a fancy chicken salad, something I thought Diana would appreciate on the beach of a Prince Edward Island hotel. 

 Here's what you'll need:

2 cups cooked chicken, cut into bite-sized pieces.
1 stalk of celery
1/4 cup diced onion
1/2 cup dried cranberries (or grapes or raisins or dried apricots, whatever your heart desires)
1/2 apple, diced
1/2 cup chopped parsley (could also add fresh tarragon or dill)
1/2 cup sliced almonds (or something crunchy, like sunflower seeds, walnuts, pepitas, etc.)
1/2 lemon
1/2-3/4 cup Greek yogurt
Salt, pepper and cayenne to taste.


Chop everything up and put it in a big bowl, then squeeze the juice from half a lemon over the whole thing, add your yogurt and spices then mix.  Feel free to adjust the quantity of yogurt if you want a "wetter" chicken salad, you could even add a tablespoon or two of mayonnaise if you so choose. 


When it was mixed, I had mine on a bed of spring greens with tomato and cucumber, but you could make a wrap, fill a pita, stuff a tomato, serve with crackers, or even smack some between two pieces of bread for a sandwich.  But no matter what, you should think about how fancy your meal would have been 100 years ago, for Diana's sake.

Monday, April 14, 2014

Making stock of the situation.


So, I have a hard time throwing things away. Especially food. I don't like for things to go to waste.  That's why keeping a stock bag in my freezer has been an amazing thing!  I can make stock out of items I would normally throw away!  It's so easy and the results are delicious!


In this batch of stock, I have a leftover rotisserie chicken. I'm going to take all the meat off the carcass and put just the skin and bones into the crock pot. It's not critical that you use bones, I just have some and eat meat.  If you're a vegetarian, go crazy with everything else!


In my stock bag from my freezer you'll find:
  • mushroom stems
  • onion skins (they make the stock really dark and flavorful)
  • old parsley
  • asparagus ends (use sparingly, they're strong, I only saved one bundle's worth)
  • carrot peels and ends ( I also added some old baby carrots)
  • green onion ends
  • celery leaves and ends
  • old bones
You can also put potato peels, sweet potato peels, zucchini, eggplant, cilantro stems, cheese rinds, kale stems, truly anything that's not too strong in the stock pot. It'll turn out fine and if for some bizarre reason it doesn't, you're not wasting money on brand new ingredients.


Throw everything into the crock pot, cover with water and add spice to taste.  For me that was:
  • 1T salt
  • 1/2 T pepper
  • 1 t thyme
  • 1 t rosemary
  • 1/2 t sage

I set the crock pot on low for 9 1/2 hours, but truly, as long as there's water you can leave the stock in there for upwards of 12 hours. 


When it's done, you have rich, flavorful, homemade stock that you can use right away, or put in the freezer. 


This batch yielded about 12 cups of stock.  After sitting in the fridge while I went to work,  I came home and strained it first through a colander and next through a fine mesh strainer, to be sure to get all the little pieces out. 

 Then I divided the stock up into quart-sized containers and put them into the freezer. 


Now the next time I'd like to make soup, or rice or beans or pasta sauce or whatever else my weird brain can concoct, I'll have delicious homemade stock to get me off on the right foot.  I've also already started my next stock bag to do it all over again!


Friday, April 11, 2014

What's for dinner? Steak.


Steak.  Ahhhhh.  It's basically the best.  When I was about eight, my mom and I met my grandmother for a weekend at the Embassy Suites of Indianapolis.  I think my grandma was there for a convention of some kind.   Anyway, this Embassy Suites had live parrots in the atrium AND a pool.  I cannot stress how cool 8-year-old Amanda thought that was. 

The other thing that changed my young life forever? There was a filet mignon on the kids room service menu that I ate for 3 days in a row.  Not only was I eating prime beef, but they were delivering it to me in my fancy hotel room, where I got to drink from cups that were made of real glass and had no protective sippy top.  

As I've grown, I've become more and more particular about my steaks.  They need to be cooked properly, but also humanely raised.  It took me a long time to feel confident making steak for myself, but now I know that I can make steak with the best of them (though I'd still rather let my dad cook steaks if I have the chance).  The steak I purchased for this evening is a New York Strip from Whole Foods, and it was admittedly a bit of a splurge, but don't worry, I know what I'm doing. 


Steak with Chimichurri:

For the chimichurri you'll need:
  • 1 cup fresh parsley
  • 1 cup fresh cilantro
  • 2 t. dried oregano (or about 3 T fresh oregano if you've got it)
  • 1 t. ground cumin
  • 1 clove garlic
  • 2 T. Red wine vinegar
  • 1/4 cup olive oil
  • A food processor or blender 
Throw all of the ingredients into the food processor and blend until it looks like this:


Bonus* it will also smell AMAZING!  Do the chimichurri first, up to a day in advance so that the flavors have a chance to mingle.  This batch was enough for 2 steaks, but I'll just use the extra for sandwiches and salads and stuff this week. 

For the steak you'll need:
  • A preheated oven at 450 degrees
  • A steak: this one was about 3/4 of a pound and 1 1/2" thick.  Thick is good for temperature control.
  • A cast iron pan (or other oven-safe pan) heated to high on the stove top.
  • 1 T of cooking oil with a high smoke point.  I like grape seed oil, but used vegetable oil because that's what I had.  It was smoky.

Dry your steak with a paper towel and then generously salt and pepper both sides (my dad likes garlic salt, and that would've been amazing, if I'd had some). 

What I wouldn't give for a gas stove, but renters can't be choosers!

Make sure your pan and oil are hot.  I like to flick a drop of water in, but mostly just because it's fun.  Gently place your steak in the pan and then LEAVE IT ALONE for 2 minutes.  When 2 minutes is up flip it and LEAVE IT ALONE for 2 minutes. During this time, your oil will start to smoke.  If you live in an apartment with hard-wired smoke detectors, like me, you may want to preemptively open windows and strategically place fans, so as not to disturb your neighbors with the blaring noise and muffled curses. Instead, you will just amuse them when they see smoke billowing out of your window and you inside trying to take a picture of a steak. 

When the second two minutes are up, take the whole pan and place inside the preheated oven for, you guessed it, 2 minutes (as many as 4 minutes if you're looking for a well-done steak, but who's looking for that?).


When it's done it will look like this.  And you should DEFINITELY put a pat of butter on the top to finish.  This is why steaks at steakhouses taste so much better than steaks at your house. It's true.


Next you need to remove the steak from the hot pan, put it on a cutting board, tented with some foil and let it rest for 6-10 minutes.  Seriously. No cutting into the middle to see if it's done.  Don't do it!  When the meat has rested properly, then...

The Mary Poppins of steaks, practically perfect in every way!
You thought it'd be burnt, huh?  Nope!  It's basically perfect.  No big deal. And you can see that because I let the steak rest, the juices are staying in the meat and not collecting on my cutting board.

Put your steak on a plate and your sauce on the steak.  Serve it with a salad (if you're trying so hard to limit carbs, but then why on earth are they so delicious and will people please stop bringing cookies to work?) or anything else your little heart desires. Then enjoy!